Last weekend we make slight few upgrades to our Lasersaur making it much easier to control air flow, extraction and power to laser just making it bit easier day to day. Thanks to all members that helped out.


The Dublin Hackerspace
Last weekend we make slight few upgrades to our Lasersaur making it much easier to control air flow, extraction and power to laser just making it bit easier day to day. Thanks to all members that helped out.
 Lithium batteries are in the news for all the wrong reasons at the moment, and not for the first time.
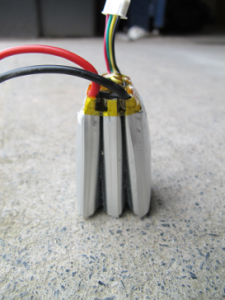
We noticed that one of our batteries was a little swollen compared to the others. It seemed to be working OK though. We decided to open up the outer wrap to see if it was one cell or all of them, and to see if anything was obviously wrong. The battery was an 11.1V 1300mAHr LIPO. Check out some pics of us cutting off the outer black covering, to reveal that all three cells were swollen. There appeared to be no external sign of damage however. The cells feel as if they are swollen with gas.
We hooked it up to the IMAX charger to see what kind of capacity our battery had. This battery is about five years old. Its nominal capacity is 1300mAHr. We fully charged it and then discharged it. We were pleasantly surprised to find it at 1095mAHr. That was discharging it at 200mA which is about C/6. By the time the charge and discharge was complete, the pack had swelled even more.
The question now is what to do with this battery. The Internet is full of videos of people doing all sorts of crazy things to lithium batteries too. We won’t be doing any of that here. We won’t be keeping this battery indoors, thats for sure. It could still be useful for some completely remote outdoor application, away from any kind of combustible material. We should probably dispose of it safely though. Note that all of the disassembly, charging and discharging was done outdoors and with lots of PPE.
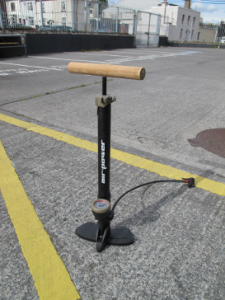 Well not quite, but a wooden handle anyway. We don’t just do bits and bytes at TOG! The bicycle pump handle broke and it seemed a shame to dump an otherwise perfectly good pump. So with a bit of nice round wood cut from an old roller blind pole, we made a new handle. Drilled a hole in the handle and a couple of small holes in the metal shaft of the piston to give the glue a bit of grip.
We wanted to use some glue with a little bit of flexibility or “give” in it, instead of something that set rock hard. That seemed to be the way the old handle was fitted. So our old reliable hot glue gun was fired up. It sets hard, but not rock hard. Pump is back in action, good as new, and it even looks a bit rustic with its new wooden handle. We have lots of members interested in bicycle things at TOG. Drop in and see what we get up to. Pics here.
Our lathe is finally getting some good use! This time, a small part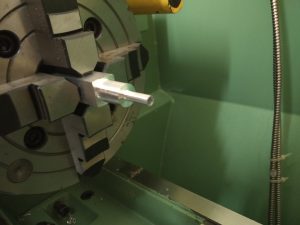 was made from aluminium, a coupling for connecting two pieces of tubing for the water cooling system in the upcoming CNC router project. It will replace the existing temporary hose-and-clamps hack.
A piece of bar stock was clamped in a 4 jaw chuck, made into a cylinder and turned down to about 16mm diameter. Next we turned half of it down to about 6mm and drilled a 4.5mm hole through it, using a drill chuck. Lastly we smoothed the edges slightly and parted the whole thing off.
The end result is more f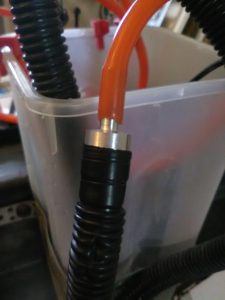 unctional and looks a lot better!
The whole operation went smoothly in overall retrospection. However, we had few small issues to deal with on the way. Firstly, it wasn’t obvious how to set gearing for the power feed, as the manual wasn’t very clear. Another problem was that the square shape of stock, required the use of a 4 jaw chuck, which is not self-centring. That adds a couple of extra steps to set up, as centring of the stock has to be done manually in such a case.
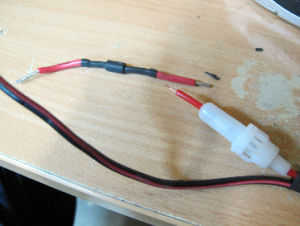
Nothing much to see here! A quick weekend afternoon hack. The ebike power supply died, so time to knock up a cable to charge the battery from a variable power supply.
A 3-pin XLR socket, a fuse holder with a 5A fuse and a diode for reverse current protection. A bit of soldering and heatshrink and we’re up and running. Checked it out. Set the power supply to 60v (same as the old charger) with 3A current limit, and we’re charging ok.
After receiving badge we had to share the Duck love, just waiting for it to be added to badge market but giving you a quick preview. Keep an eye out for it.