Fixing an Electric Shaver and some Battery Investigations

shaver repair

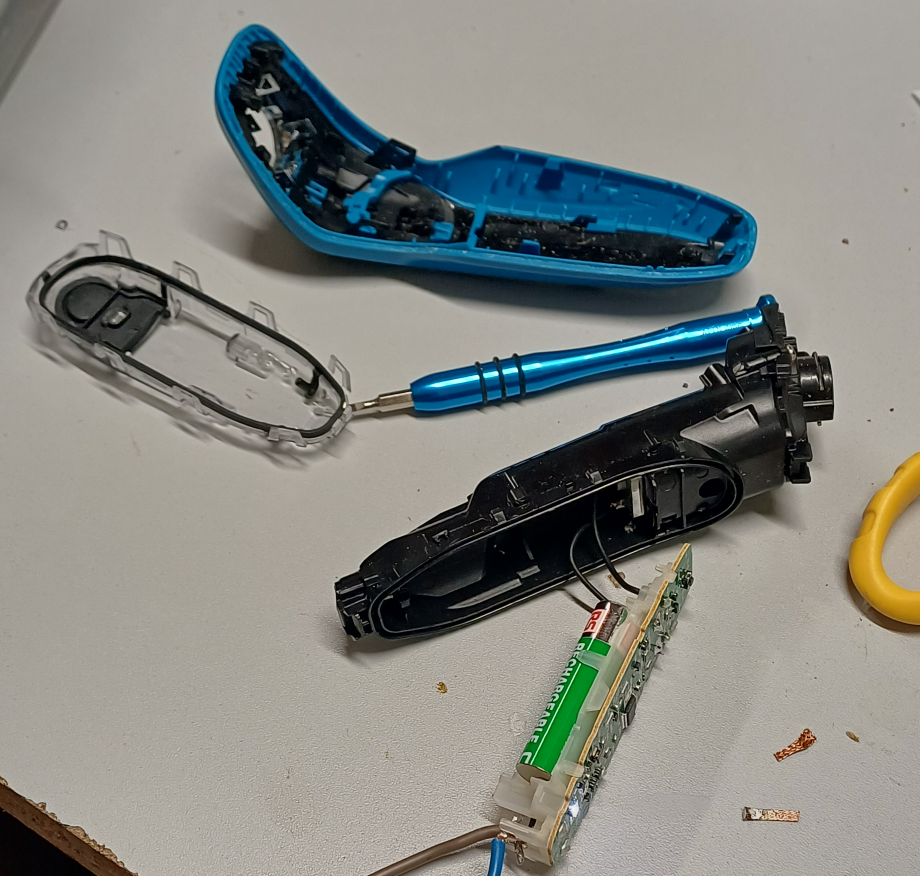
Nothing terribly complicated here. Just replacing the batteries inside a Phillips electric shaver. The batteries had gradually been deteriorating. Not even giving enough time to have a shave! Time for some replacements.

We bemoan the fact that so many things are un-repairable nowadays. There was a time when repair services and shops for many household things were common. There are still actually repair centres for shavers however, where you can get a battery and heads replaced. TOG itself is no stranger to the Repair Cafe movement. We just had a big one this month, and our next one is in June. We repair things for free…. to keep things in-use for longer and to reduce waste.

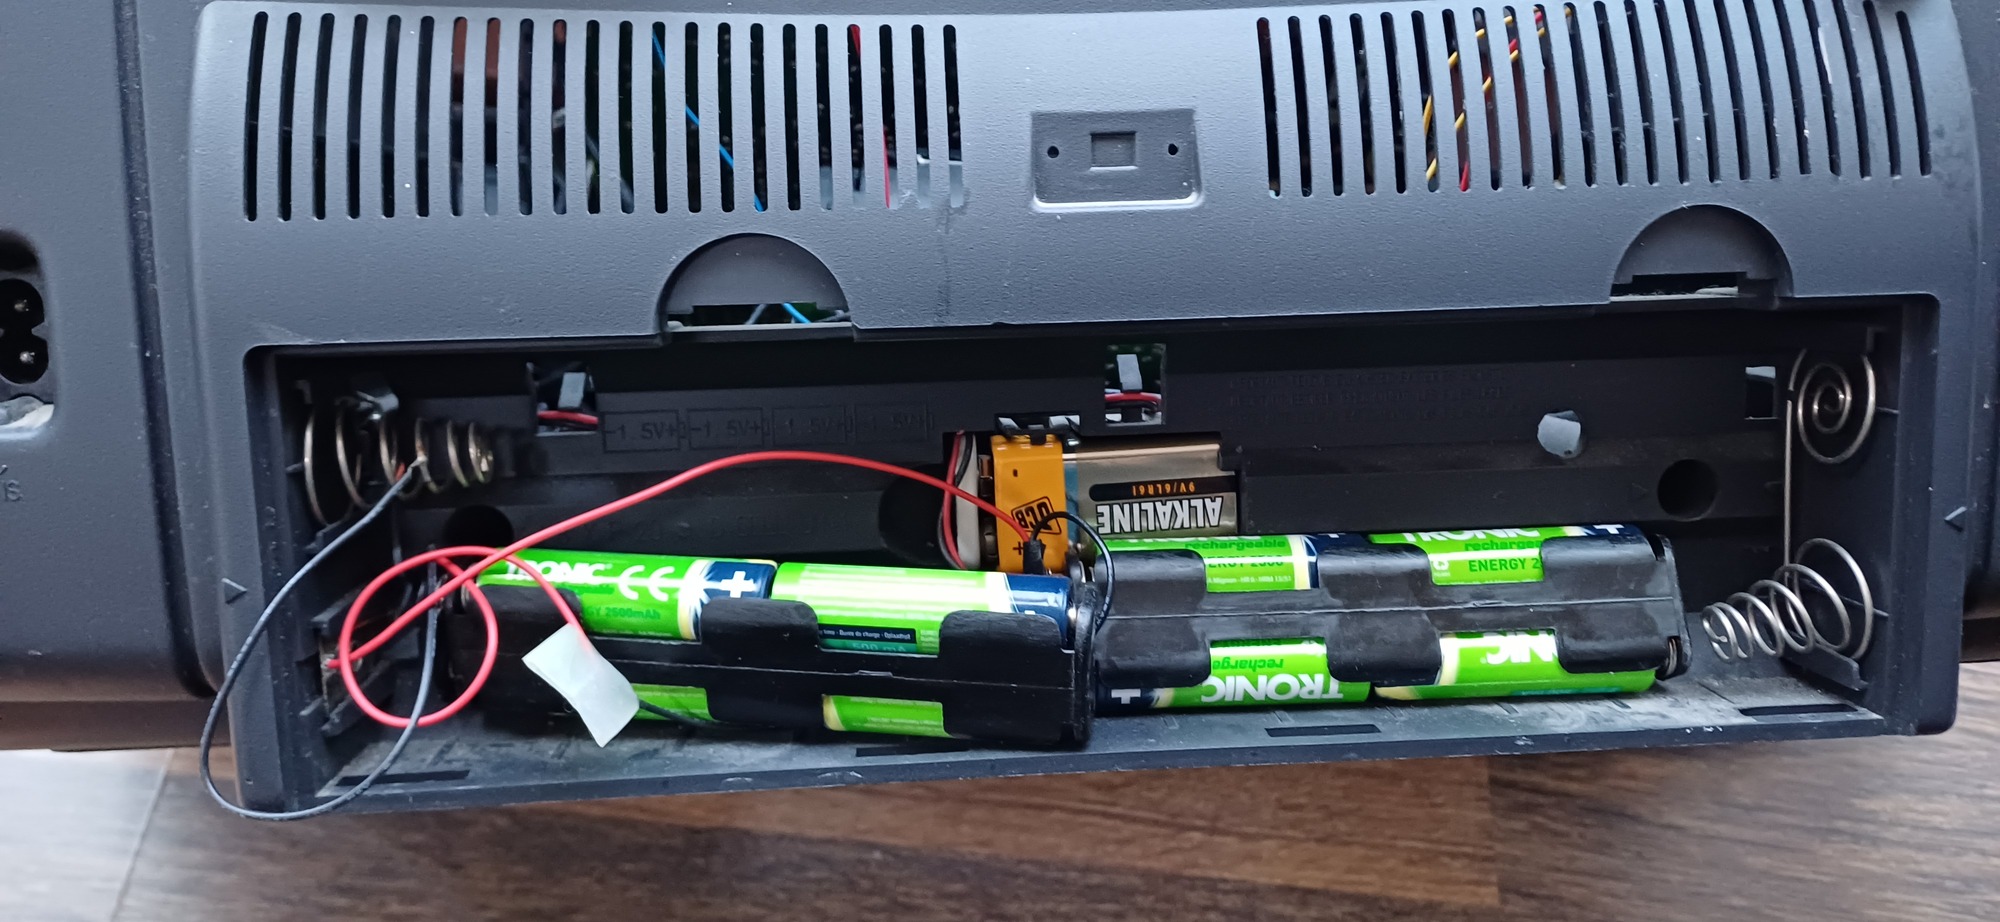
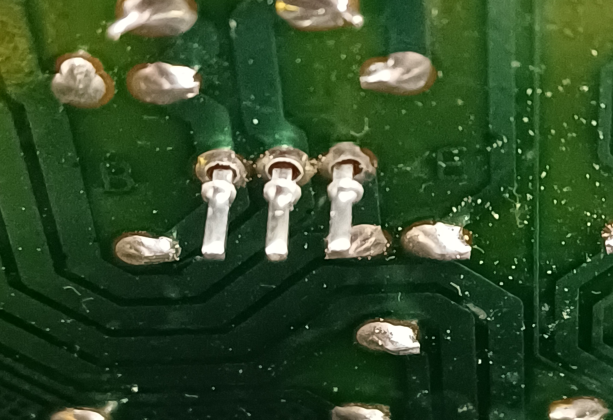
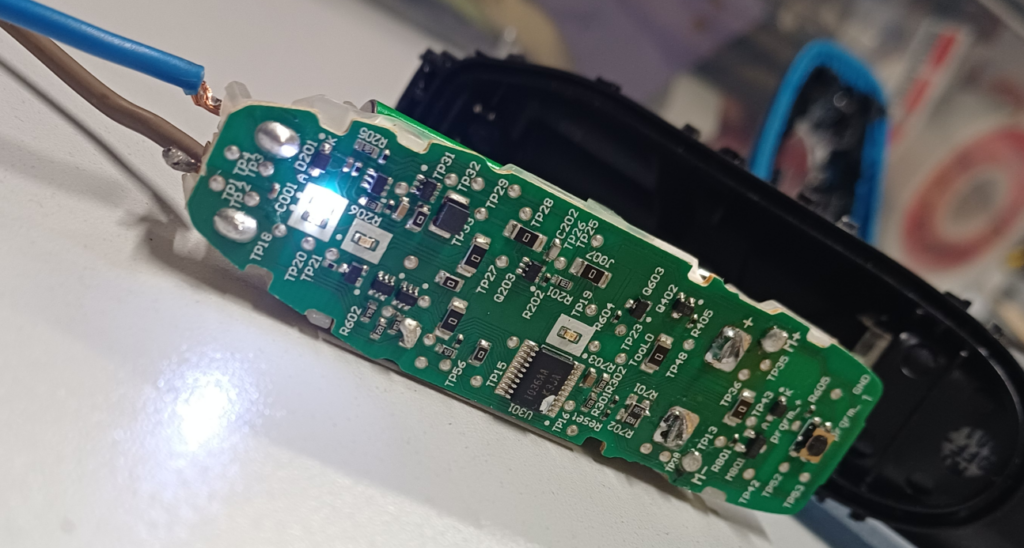
Surprisingly, the batteries inside the shaver are just AAA nickel metal hydride cells. Albeit ones with solder tags for soldering to the circuit board inside. Replacing the batteries and putting it on-charge, we’re now back in action.  The circuit board inside seems remarkably complicated, but we didn’t delve into why.

circuit board

In replacing the batteries however, we came across something interesting. We found a brand-new, old-stock battery. Manufactured in 2021 and still sealed in it’s original packaging. So we were wondering would it be entirely dead, or would there be any life left in it after over 4 years unopened.

discharged battery

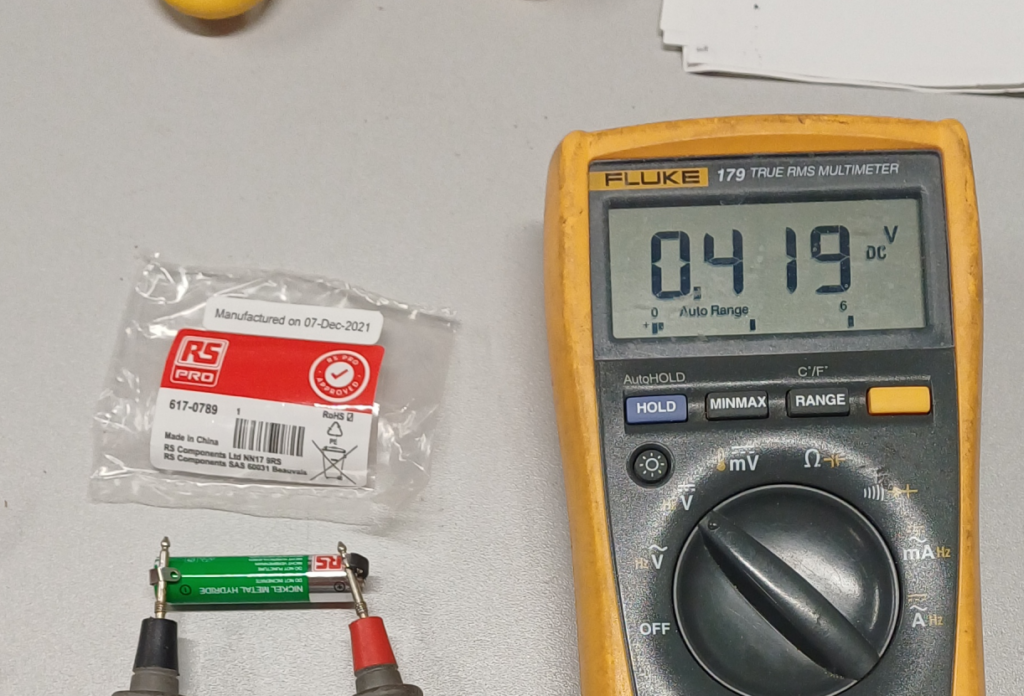
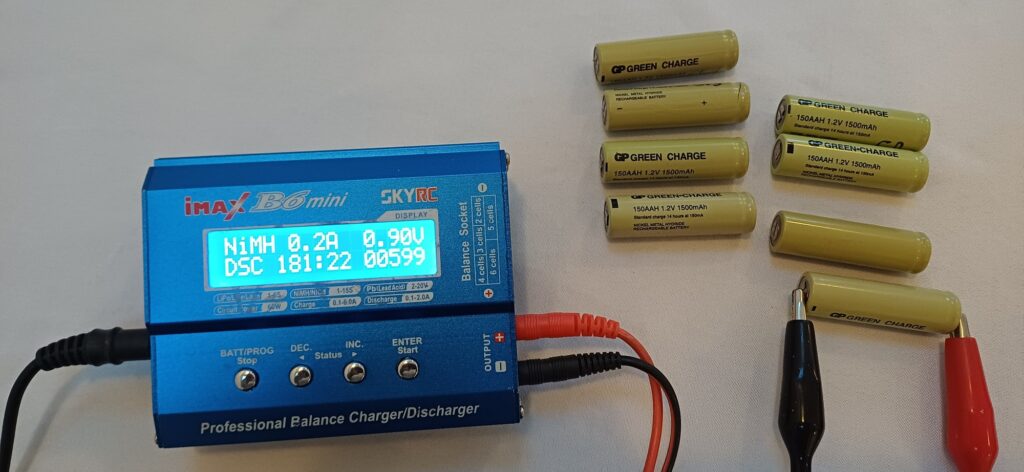
On opening the package, we found the battery sitting at 0.4 volts….. completely discharged! Not sure what lying discharged for so long has done to the battery chemistry, but we wouldn’t use it in anything important, even if it does take a charge. We’re going to put it on the Imax charger and measure how much capacity it still has.

Reviving a 20+ year old mini-DV camcorder

camcorder revival

This Canon mini-DV camcorder was bought new, sometime around 2002 / 2003. Even then however, the writing was on the wall for tape-based video recording. Mobile “feature” phones of the time were already starting to have better and better cameras, and the price of USB sticks and memory cards were falling rapidly while increasing in capacity.

In 2005, the camcorder was connected to a PC via its FireWire socket. Many of the video clips were pulled over onto the PC. In the transfer process however, the metadata from the clips including the timestamps were not copied. It’s impossible to tell today when the clips were taken. So the plan was to fire up the camcorder and see if the clips could be copied again, or even the date stamps transcribed manually.

First and most obvious thing was that the battery was stone dead. Popping the battery case open, there were two lithium cells in series and both were absolutely dead….. zero volts. We replaced the two cells with two 18650’s, but the battery pack output was still zero. A little trick we’ve learned, and one that we put to use several times at our repair cafe this week, was to charge the pack briefly which seems to wake up the onboard BMS. After doing this, the pack was now outputting almost 8 volts.

Now the next hurdle. Would the thing actually switch on and work? 20 years is a long time for electrolytic capacitors, and rubber belts and drive wheels turn to a sticky goo over time.

Snapping the battery into place and switching on, amazingly the thing came to life! The pop-out video screen was alive, but the look-through viewfinder seemed to be dead. Next test was to see would it accept a tape. It did, and the tape threaded up okay. Pressed play and the thing worked! You can see the timestamps on the clips from 2004!

If you have any mini-DV tapes that you want to check, or you like tinkering with this kind of stuff, come and see us in the space any Monday or Tuesday evening. There’s always something interesting going on.

More Philips Boombox Tinkering

new AA cells

Having recently fixed the Philips boombox CD player, we decided to review the battery compartment mod, done at least 20 years ago, and still working.

The original idea was to fill the battery compartment with 8x rechargeable D cells and arrange that they would be constantly trickle-charged while the mains lead was plugged in. The battery compartment’s positive terminal was connected via a current-limiting resistor to the power supply section of the PCB. This trickle charges the cells at about 10mA. This is enough to charge them up over a few days, but not enough to cook them.

Good quality branded rechargeable D-cells are relatively expensive…. about €10 a pop for a ~10Ah cell, so it’s about €80 to fill the battery compartment. Given that the thing is not used that often on battery, this was a bit much. So instead, 8x AA cells were used in holders, and soldered to the existing connections in the battery compartment. The cells were NiMH made by GP and rated at 1.2V, 1500mAHr. This mod was done, we guess sometime around 2000.

So today, ~25 years later, new cells were fitted and we measured the capacity of the original cells. Discharging at 200mA to a cutoff voltage of 0.9V, the original cells tested at 599mAHr…. about 40% of their original nameplate capacity. The new cells fitted are from Lidl and are rated at 2500mAHr.

Another “Miracle” Repair

CD Mechanism

OK, so not quite as old as that 1970s tape recorder that we fixed last week, but a 1996-vintage Philips AZ8640 Radio-Tape-CD boombox. The CD had stopped working, but the tape and radio were still fine.

Opening up, these things are not meant to be easily disassembled. They tend to be built from the inside out, with not much thought about future disassembly or serviceability.

When we fix old electronics, there are a few “usual suspects”, which quite often give us a fix. Old electrolytic caps are one…. they dry out after a decade or two of service. Another is bad connections or solder joints.

Solder joints, cracked or so-called “dry”, can be hard to see sometimes. Wiggling the component legs can help you see them, or simply re-touching all joints with fresh solder can do the trick. This one was quite spectacular, however.

A 3-legged power transistor that supplies power to the CD mechanism, looks like it had moved on its heat sink, and the 3 solder joints had completely detached from the PCB. Re-soldering the 3 joints brought the CD back to life. The transistor looks like it’s held to the heatsink by a spring clip rather than a screw. Perhaps the spring has failed. It’s very hard to see, and it’s a nightmare to remove the circuit board to check.

Failed Joints

Interestingly, the transistor, a BD236, is still available new from Farnell at €0.72! Here’s hoping for another 30 years of service.

Ebike BMS Upgrade

An ebike battery from 2012 has given great service, but the balancing of some individual cells in this 16S Lithium Iron Phosphate battery started to take much longer than others. Eventually, some cells would not balance at all. Each cell has its own “channel” on the battery management system (BMS). A red LED on the BMS should illuminate when the cell comes up to full charge.

On closer examination, some of the sense wires to individual cells were found to have become disconnected. These were resoldered which brought some improvement, but still balancing was not happening consistently. Some damage and corrosion on the BMS circuit board was then found. In the world of ebikes, things have moved on quite a bit since 2012. So it was decided to replace the stock BMS with an up-to-date Bluetooth enabled one.

A “JK” BMS was chosen, which seems to be a popular brand from various online forums. The one page “manual” that came with the BMS isn’t the best, and would probably get a “could do better” if it was a school or college project. Thankfully, with a bit of help from a number of YouTube channels, the BMS was fitted ok and started up. With the matching smartphone app installed, it’s cool to see all the individual cell voltages in real time and the balancing happening before your eyes.

If you’d like to see these kinds of fixes and mods that we get up to, drop in to our Monday night Electronics or Tuesday Open House.
 

Electronics Night is Back!

With the Covid situation easing, we are re-starting our regular Electronics open evening in the space. This is one of our longest-running regular events. It has been a regular feature of our calendar since the early days of TOG. It takes place fortnightly on Monday evenings. Check our events calendar on this blog, Meetup and our social media for the next date.

These evenings are free to attend for members and visitors alike. No booking is necessary. Just turn up! Everyone from absolute beginner to experienced is welcome. These evenings are not classes or tutorials, rather a very friendly informal evening.


We have a wide range of people who come. Some are absolute beginners who do not even work or study in these areas but are interested to know more. Others have something that they are already working on. We almost always have some first-time visitors, and we always give them a tour of the space.


Come in with your Pi, Arduino, or whatever you have. Bring your laptop. Maybe you want to make something, solder, breadboard or use our electronic gear. Maybe you have some vague ideas and just want to get started, but you’re not sure how to. Or maybe you’re just curious……if so, it’s fine to come along and just see what others are doing. Hope to see you on the night.

During Covid, we moved into our new space in Bluebell. The space and our electronics room are still works in progress. If you would like to get even more involved and have the full use of our space, we would be delighted to have you as a full member. Membership brings many benefits.

We are located behind Mr Price and the Bright Lights store on Kylemore Road. There is lots of parking available. Hope to see you some Monday evening.