When you think of fairgrounds or arcades, you often picture the classic “hammer strength” game – swing a mallet, ring the bell, prove your power. For Dublin Maker this year, I wanted to flip that idea on its head – literally. Instead of smashing something down, players pull upwards against a resistance. That’s how the Reverse Hammer Machine was born.
It’s part carnival attraction, part engineering challenge, and part community experiment in building something a little quirky, a little geeky, and a lot of fun.
The Concept
The idea was simple:
- Replace the hammer strike with a pulling action.
- Use a Bluetooth-enabled crane scale to measure how much weight someone can pull.
- Display the results on a big screen so everyone around can see the outcome.
Rather than brute force through a mallet, the machine measures grip and pull strength. It’s surprising how competitive people get once the numbers are up in lights!
How It Works
The machine looks like a cross between a fairground attraction and a maker project gone wild. Here’s what’s inside:
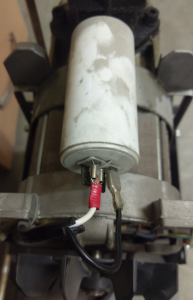
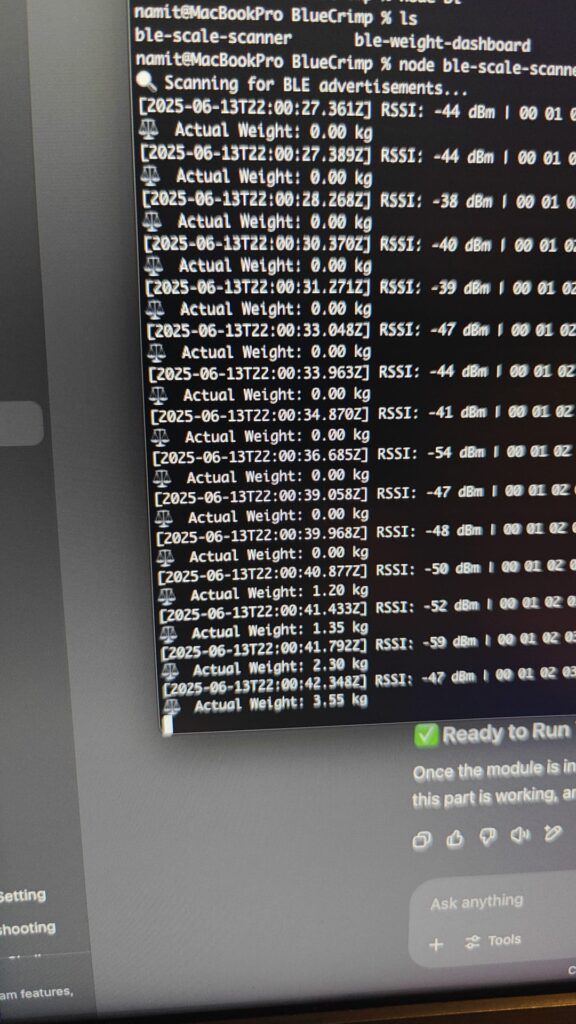
- Bluetooth Crane Scales – these are normally used in warehouses or for weighing heavy loads. I hacked one into the system to register the pull force. Aliexpress special
- ESP32 Controller – a small but mighty microcontroller that handles the Bluetooth connection, reads the data, and passes it on.
- LED Strip – mounted along the board to give a visual indicator of how much force is being applied. The harder you pull, the higher the light climbs.
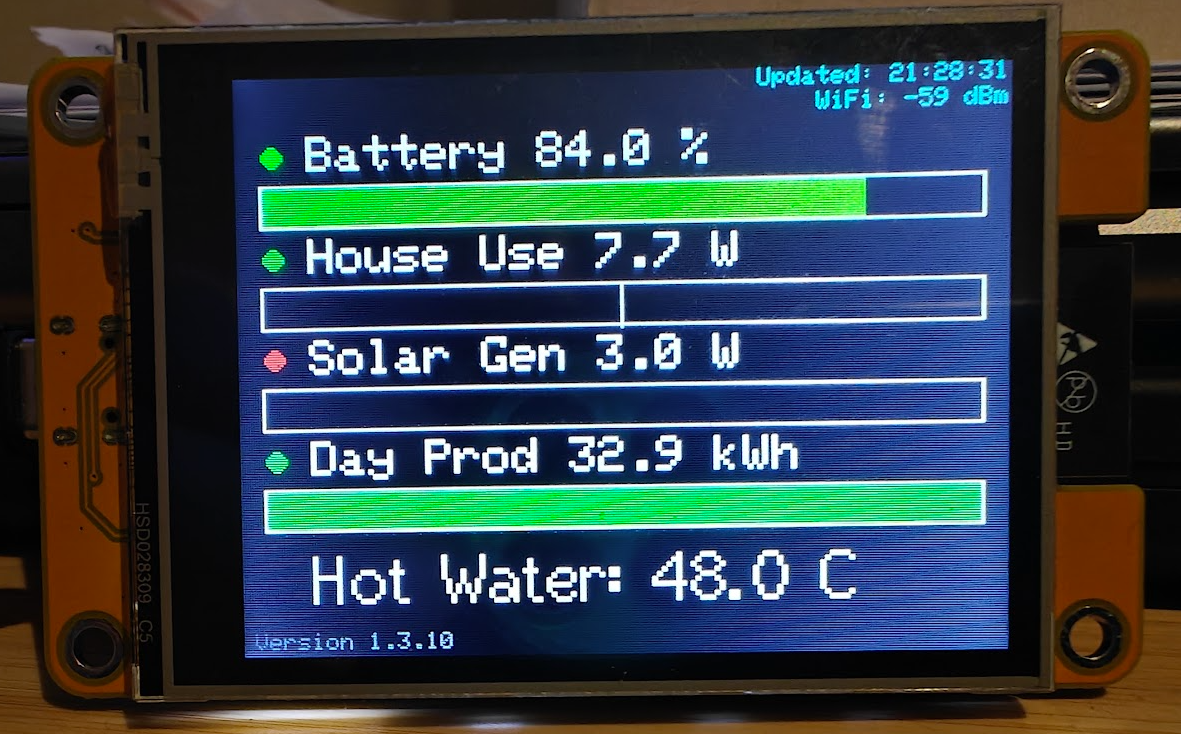
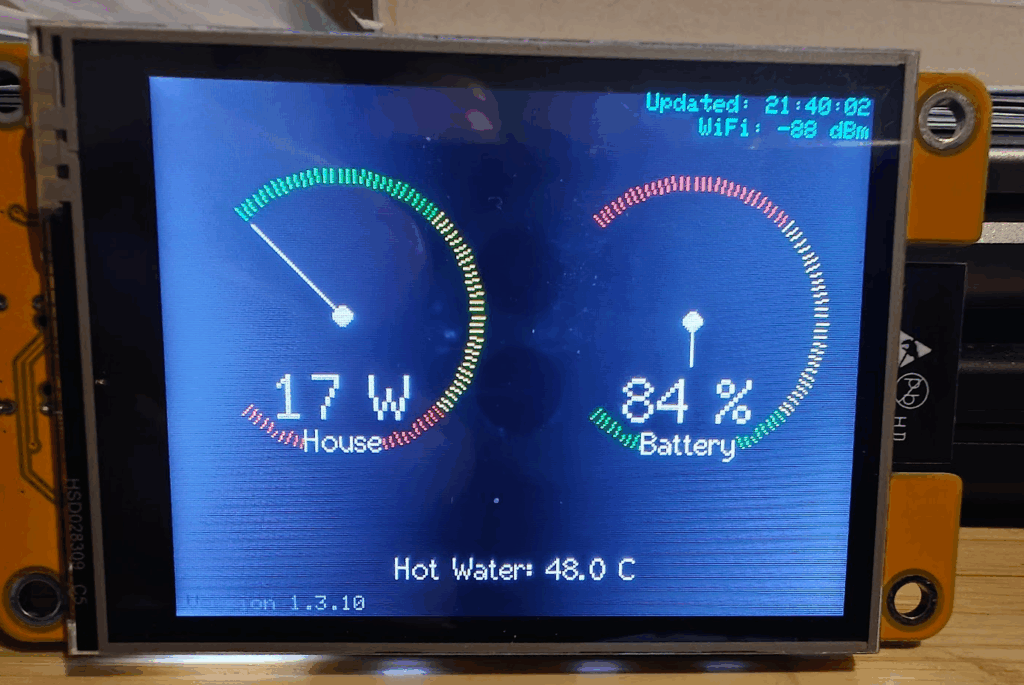
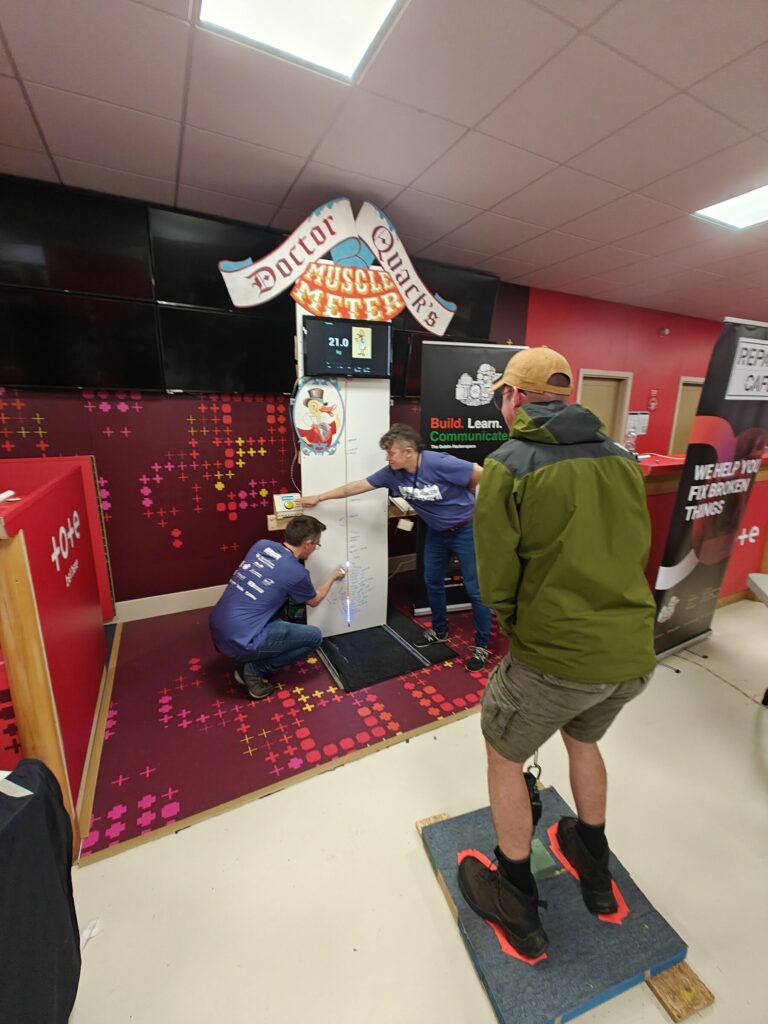
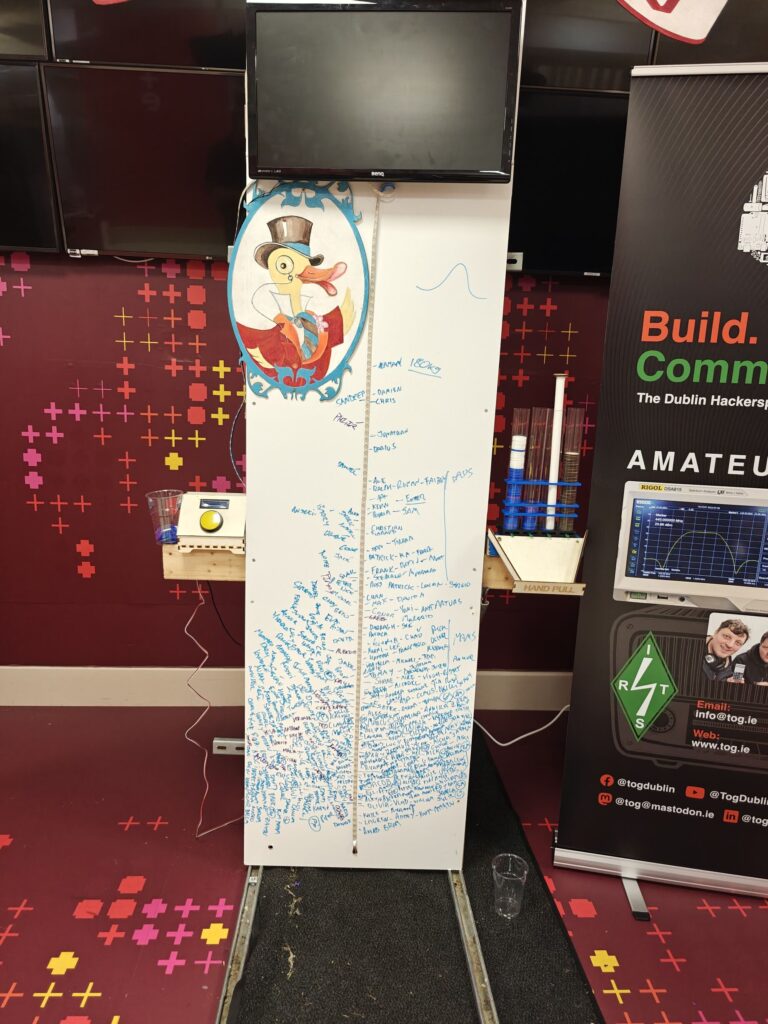
- Display Screen – the live weight reading is shown on a large monitor, complete with a fun duck mascot illustration for a playful touch.
Players grab the rope, pull upwards, and watch their strength measured in real time. The numbers shoot up on screen while the LED strip glows higher and brighter – instant feedback, instant bragging rights.
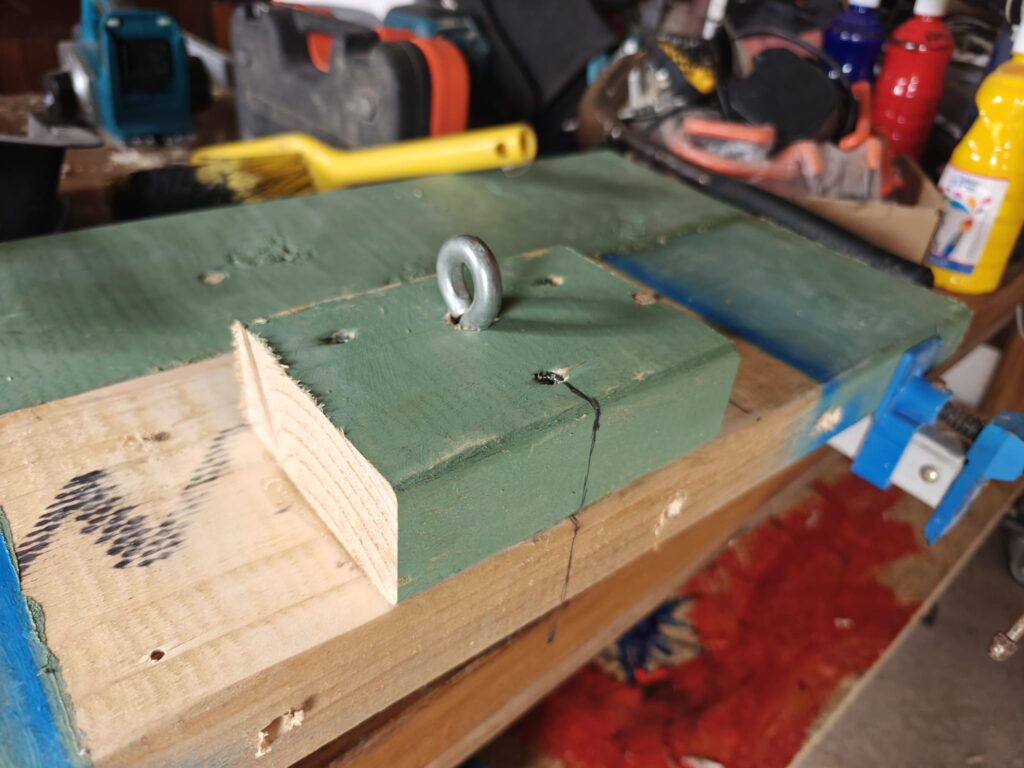
The Build
I built the frame tall and sturdy, with enough presence to attract attention across the room. The whiteboard-style front not only holds the LED strip but also doubles as a canvas for signatures and doodles from players.
For more photos of the build, check out our gallery.
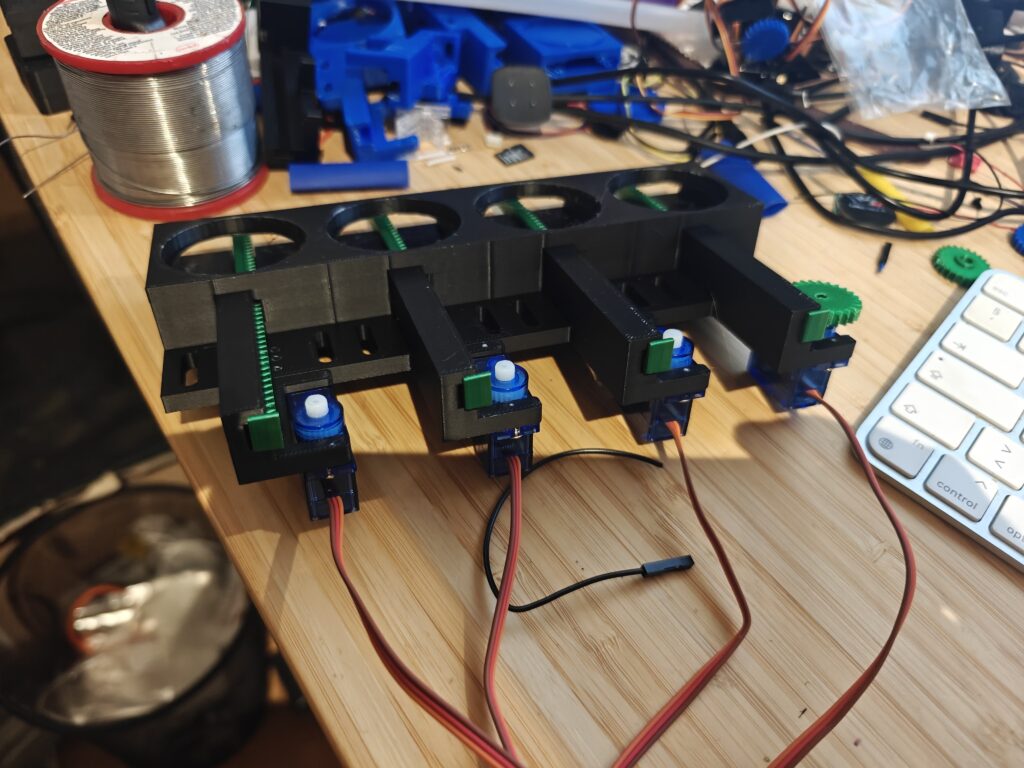
Some key features of the build:
- Mechanical setup: The rope feeds through a pulley at the top so players can get a good pulling grip.
- Electronics box: A control panel with a button and a microcontroller sits neatly to the side.
- Data display: The Bluetooth scale readings are processed by custom code and displayed on the big screen with graphics.

The artwork – a cheerful duck in a top hat – was added to keep things light-hearted and tie in with the playful Dublin Maker spirit.
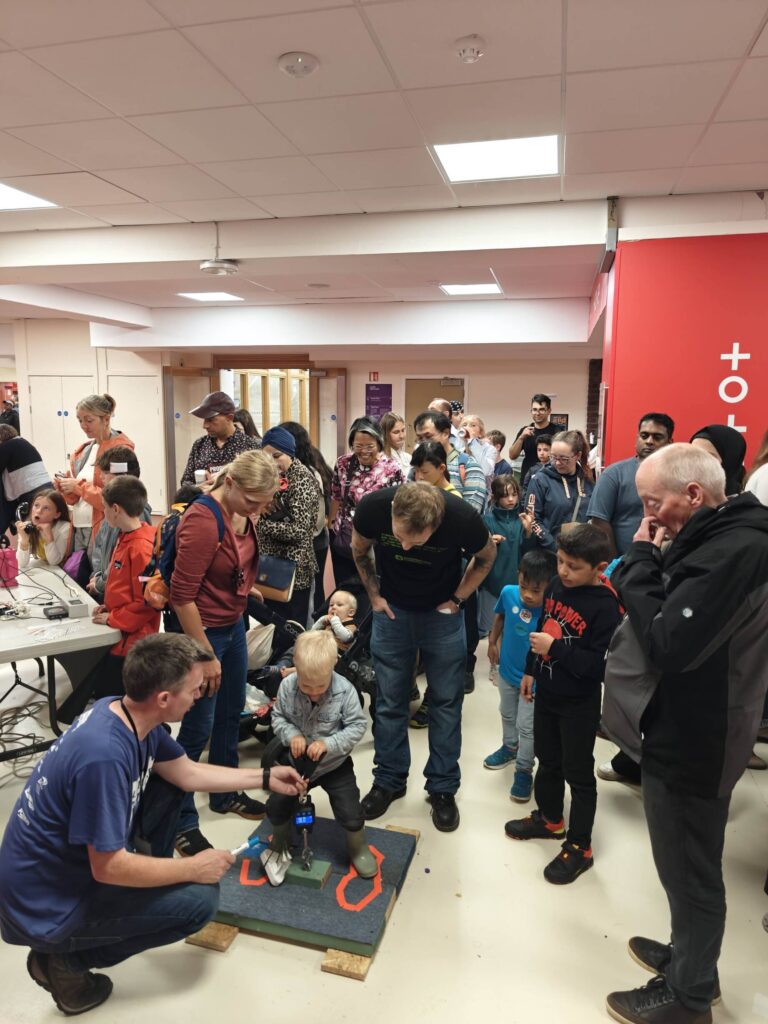
On Show at Dublin Maker
The Reverse Hammer Machine made its public debut at Dublin Maker, where visitors of all ages lined up to test their pulling power.
Lessons Learned
As with any maker project, there were a few quirks and challenges along the way:
- Bluetooth quirks – the crane scale wasn’t exactly designed to be hacked, so getting stable data required persistence.
- User safety – people can pull harder than expected, so making sure the frame was strong enough was a priority.
- Showmanship – it’s not just about the electronics, it’s about making it fun and inviting to play and the competition of competing against family and friends.
By the end of the day, the board was covered in names, the LED strip had seen plenty of action, and the duck mascot had overseen countless strength contests.
Why Build It?
The whole point of Dublin Maker is to share creativity, curiosity, and the joy of making. The Reverse Hammer Machine isn’t just about strength – it’s about turning an idea into something physical that makes people smile.
It blends hardware hacking, coding, design, and a touch of carnival silliness into one interactive exhibit. Best of all, it gets people talking, laughing, and competing in the spirit of fun.
What’s Next?
I’d love to refine the project further:
- Add a leaderboard system that stores top scores during the day.
- Integrate sound effects for dramatic impact when someone hits a new record.
- Maybe even design multiple “difficulty modes” with adjustable resistance.
The great thing about projects like this is they never really finish – there’s always another upgrade waiting to happen.
Bringing It All Together
The Reverse Hammer Machine shows what can happen when you take a familiar idea and twist it. By hacking together a Bluetooth crane scale, some microcontrollers, and a splash of creativity, you end up with something that feels both retro and futuristic.
It’s a reminder that engineering doesn’t have to be serious – sometimes the best projects are the ones that make people grin.