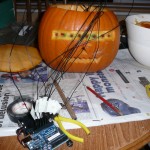
While looking for something totally unrelated on the Internet a few days ago I came across a Larson Pumpkin. As it was coming up to Halloween I decided to have a go myself and see what I could do using an Arduino.
Here are some pictures of the work in progress:

The design was very simple. An Arduino board with 9 output pins powering 9 LEDs. 8 red ones on the front for the scanning eye and a yellow one inside to replace the candle. The code is also very simple. A rework of code I wrote many years ago to play a pong sort of game with the ball bouncing back and forth. It keeps a counter for where the light is in the row and a counter for what direction it is heading +1 or -1 for forwards or backwards and then just keeps adding until it hits one end.
I’ll upload that and some more photos for a ‘how to’ if anyone else fancies having some pumpkin fun. The pumpkin travels to work with me tomorrow as it is ‘Halloween’ Day. When it comes home tomorrow I am going to add a little speaker and a distance sensor – thank you Rob for the loan 🙂 and I’ll add some code so it makes noises and they increase in pitch and maybe volume as people get nearer and nearer. Oh the fun you can have with a pumpkin when you add an Arduino.
