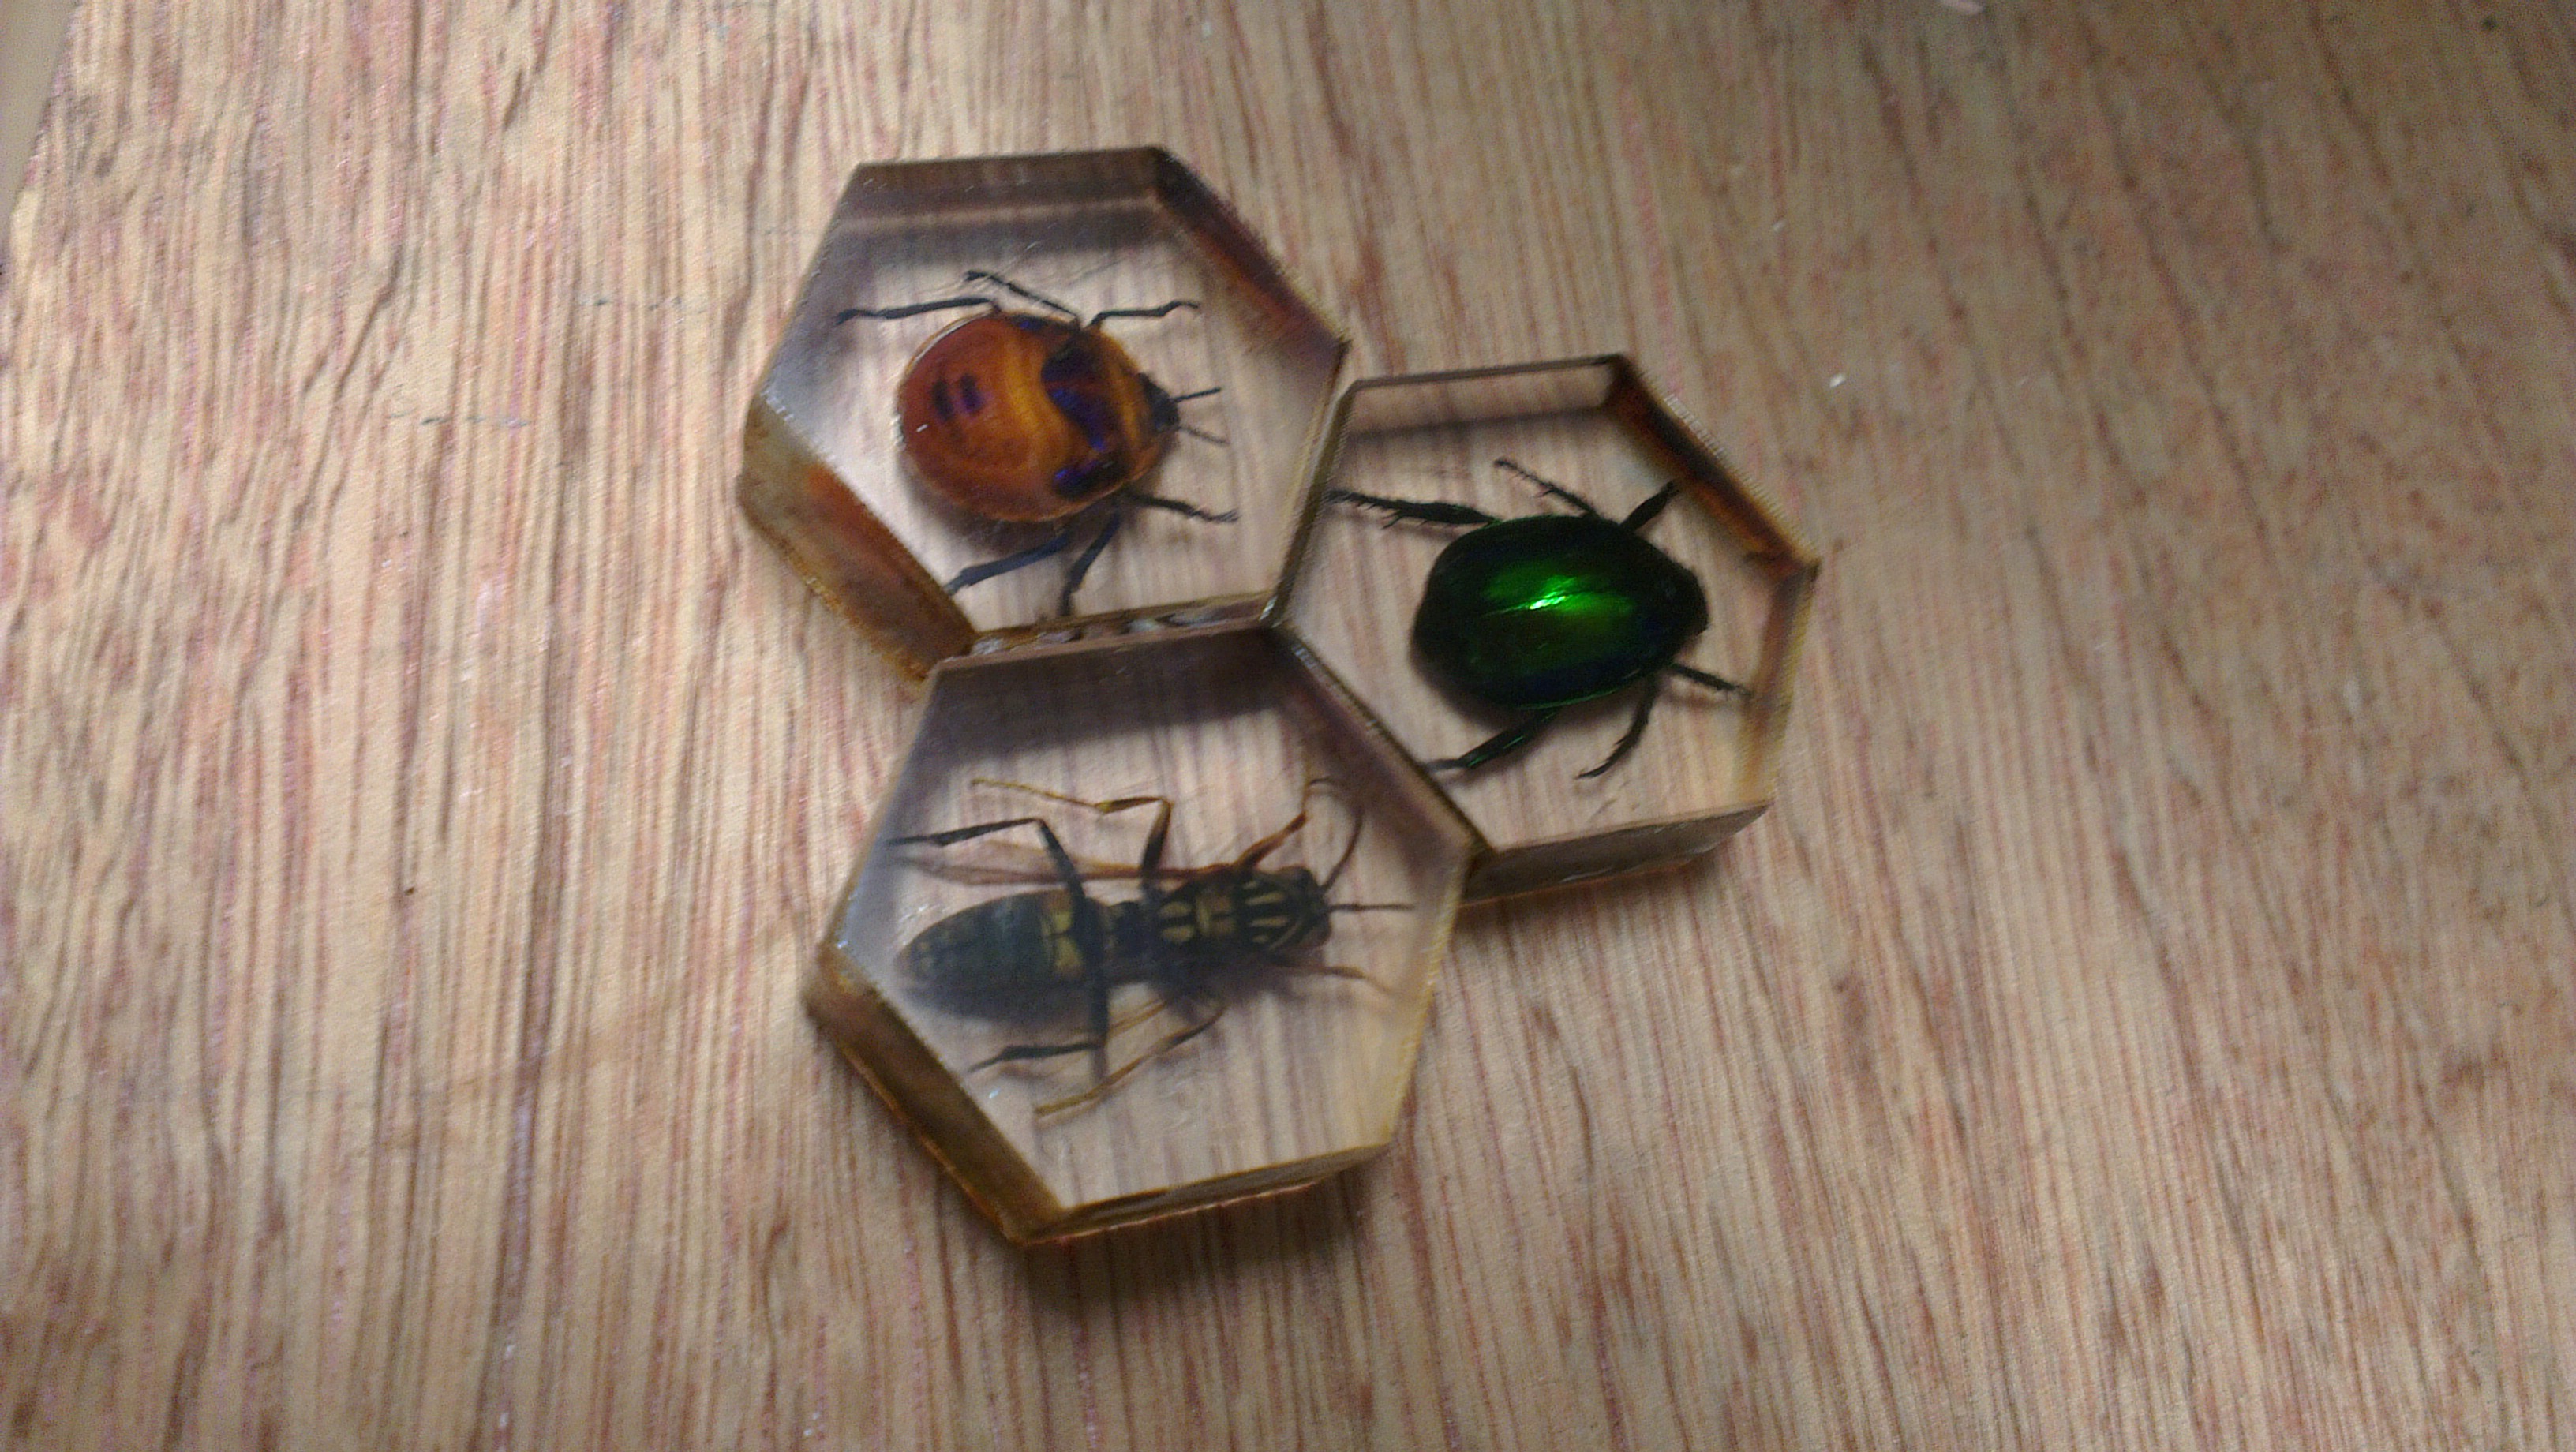
So I came across these interesting insect specimens encased in acrylic, and thought to myself that these would make snazzy custom hive pieces.
First step was to measure up the acrylic blocks for size then take a photo and bring it into inkscape. Draw a rectangle that lines up with the acrylic block edges, select the picture and rectangle and go Object->Clip->Set to crop the image to the edges of the block. Then scale down the image to the real block size in mm.
These blocks are 45mm by 30mm so I create a green rectangle to those dimensions then center the picture in this green box.
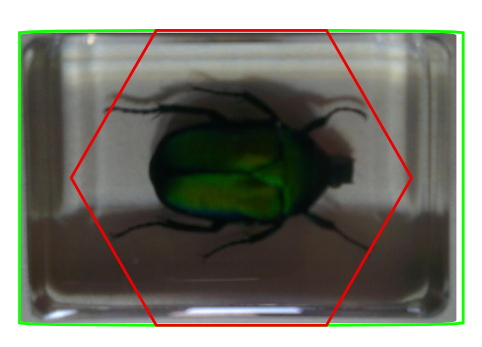
To create the hexagon go the pentagon&star icon, then enter 6 sides and drop the hexagon near the picture. I’ve made the hexagon 30mm from face to face so that it maximizes the area of the block. Line up the hexagon in red with the parallel sides in line with the width.
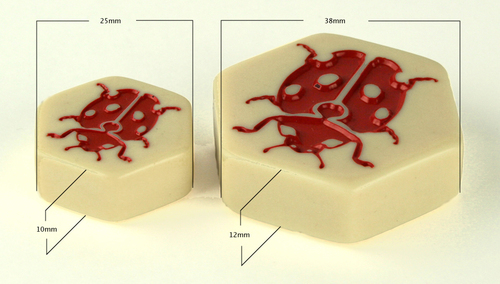
The original tiles are either 25mm or 38mm depending on the version, but as these are custom it’s an acceptable compromise between the two.
Another compromise is that the insect icons have the head pointing towards the flat face in the original but we point them to the corner, otherwise we end up cutting into the body of the insect.
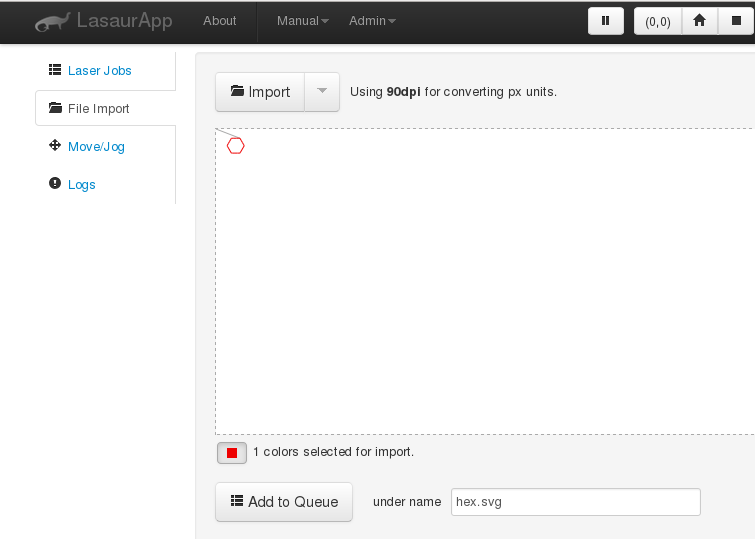
Once happy with the alignment, set the bed area in inkscape to 1220mm wide by 610 high in File->Document properties. This is a prerequisite for using our Lasersaur, but it also makes it easier then to place where the piece will be cut relative to the bed.
Save your work out and remove all the elements except for the green rectangle. We save off this rectangle as rect.svg then do the same for the red hexagon that we center centered with the rectangle. Start up the lasersaur app or connect to it as a web service and import in the rectangle. Add it to the queue and set the feed rate to 1500 and the laser power to1% . What we are doing here is just scoring the mdf destruction sheet so we can line up the acrylic block.
Once the rectangle is scored do the same for the hexagon.
Then take one of the acrylic blocks and spray mount the back of it. (More on this later). Align the block with the scored square and press down lightly.
Send the hexagon back into the lasersaur queue but set it to 3 passes with each pass at 50% power at 300mm/min feed rate. This should get through the 8 to 10 mm of acrylic.
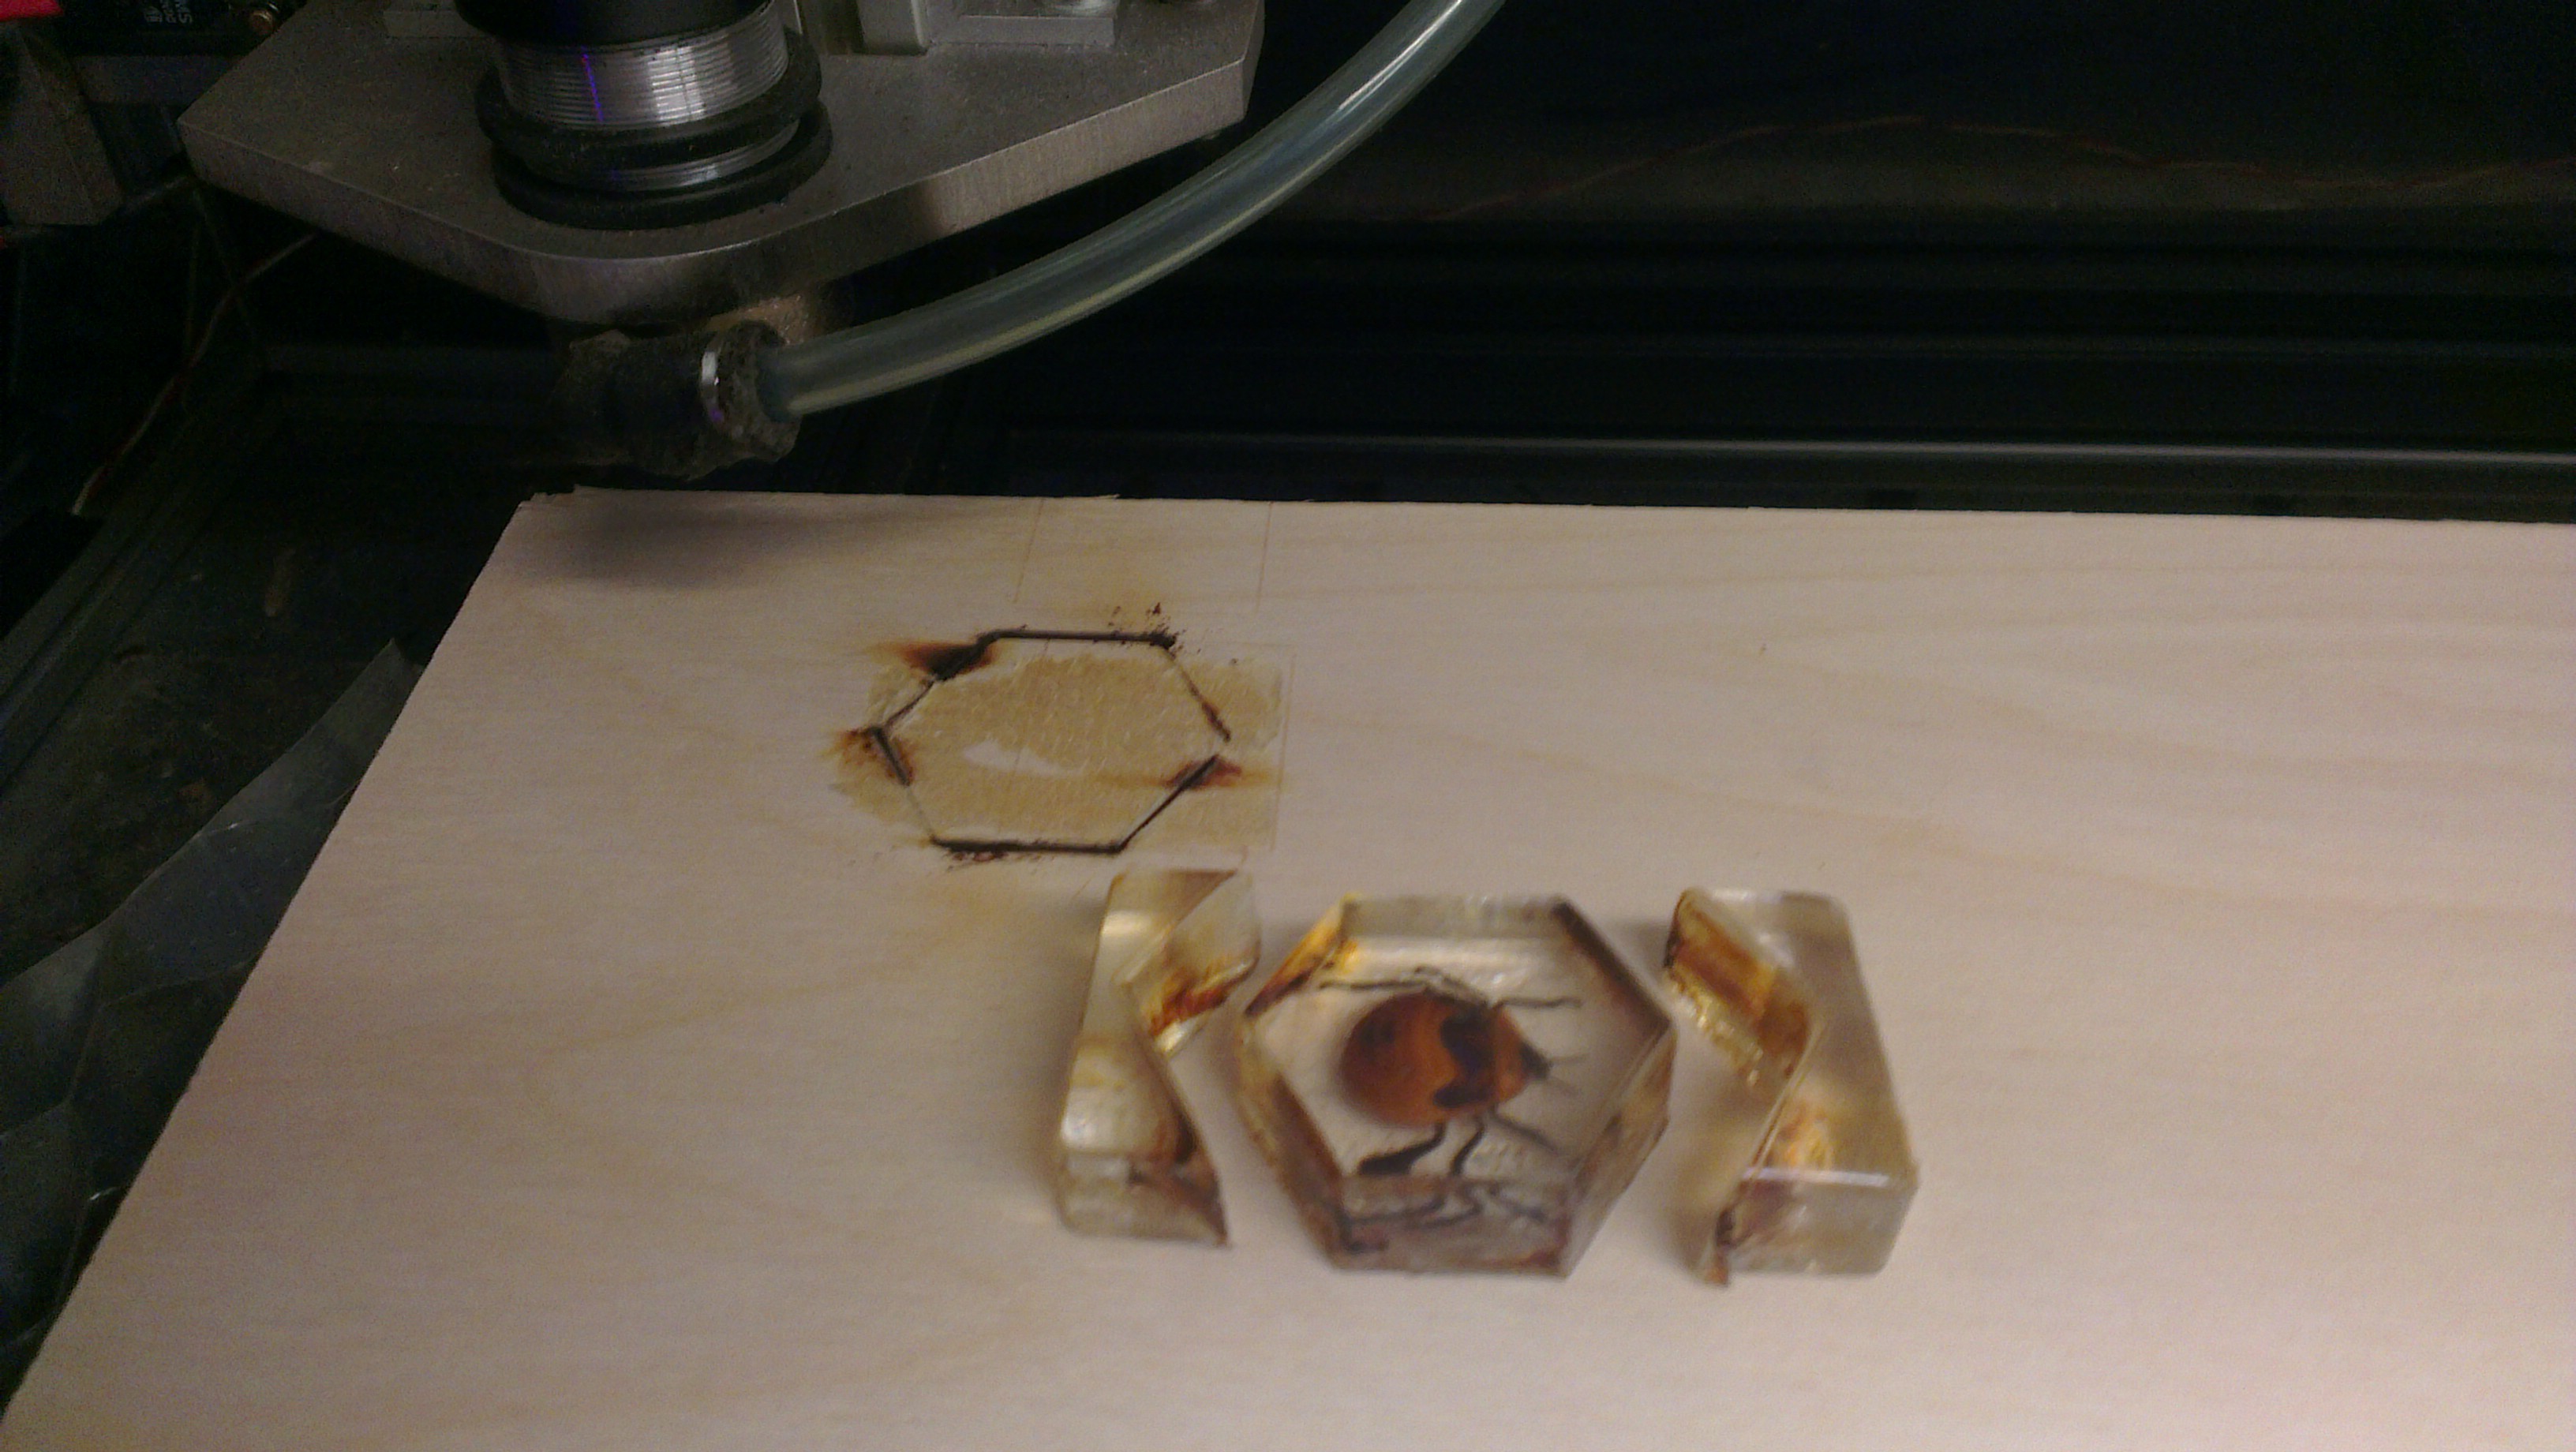
Once the heddy fumes have extracted out from the bed we can open it and examine the piece. It should just lift from the mdf with minor force.
A few more runs and we have the start of our own custom set of Hive pieces.
As the spray mount is tricky to remove, some white spirits will wipe it off quite easily. The trouble is that if you machine or laser cut acrylic it can set up micro striations in the material (crazing) that show up once you apply a solvent or glue. A workaround could be to stick down the block with double sided sticky tape.
Another issue is that you need to get the feed rate & power balance so that you don’t scorch the edge. You can tidy this up by using a scrape or stanley blade to clean up the edges, then flame polish the edge with an oxy-acetylene torch.
@Gen42games how-to make real insect hive tile pieces http://t.co/HpK5upt8cl
that is just awesome!
I just started playing hive and this would be a super set to have.
Would you be willing to produce another set for sale?
Hi Kie,
Thanks for the thumbs up. This was more of a test of our new laser rather than a production run of hive pieces. Also, not all of the insect types were available from the store so there would need to be swaps. Along with that I’m not certain how to proceed with differentiating the sides, possibly staining. Most likely we may just make a bespoke set from wood.
Regards
Dobo